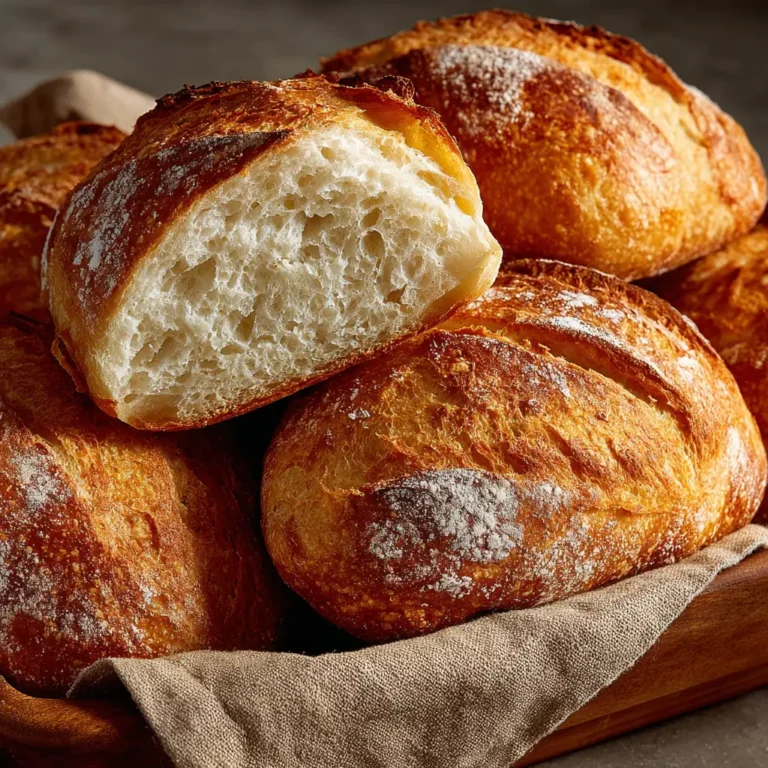
Tasty Homemade Crusty Italian Bread
Have you ever wondered why the aroma of freshly baked bread can evoke such warmth and comfort? The answer lies in a simple yet profound fact: the act of baking bread not only fills your home with delightful scents but also creates a sense of satisfaction that few other culinary endeavors can match. In this post, we’ll explore how to make Tasty Homemade Crusty Italian Bread, a recipe that captures the essence of traditional Italian baking while being surprisingly easy to follow. With just a few ingredients and some patience, you can create a loaf that is crusty on the outside and soft on the inside, perfect for any meal or occasion.
Ingredients List
To make your Tasty Homemade Crusty Italian Bread, you will need the following ingredients:
- 4 cups all-purpose flour (or bread flour for a chewier texture)
- 1 ½ cups warm water (about 110°F or 43°C)
- 2 teaspoons active dry yeast
- 1 tablespoon sugar (to activate the yeast)
- 2 teaspoons salt (for flavor)
- 1 tablespoon olive oil (optional, for richness)
This combination of ingredients will yield a beautifully textured bread that is perfect for sandwiches, bruschetta, or simply enjoyed with olive oil and balsamic vinegar.
Step-by-Step Instructions
Step 1: Activate the Yeast
- In a small bowl, combine warm water, sugar, and active dry yeast. Stir gently and let it sit for about 5-10 minutes until it becomes frothy. This indicates that the yeast is active.
Step 2: Mix the Dough
- In a large mixing bowl, combine the flour and salt. Make a well in the center and pour in the yeast mixture along with olive oil (if using).
- Stir with a wooden spoon until the dough begins to come together.
Step 3: Knead the Dough
- Transfer the dough to a floured surface and knead for about 10 minutes until it is smooth and elastic. If the dough is too sticky, sprinkle a little more flour as needed.
Step 4: First Rise
- Place the kneaded dough in a lightly greased bowl, cover it with a damp cloth or plastic wrap, and let it rise in a warm place for about 1 hour, or until it has doubled in size.
Step 5: Shape the Loaf
- After the first rise, punch down the dough to release air. Turn it out onto a floured surface and shape it into a round or oval loaf, depending on your preference.
Step 6: Second Rise
- Place the shaped loaf on a parchment-lined baking sheet or in a proofing basket. Cover it again and let it rise for another 30-45 minutes.
Step 7: Preheat the Oven
- Preheat your oven to 450°F (232°C). Place a baking stone or an inverted baking sheet in the oven to heat.
Step 8: Bake the Bread
- Once the oven is hot, make a few shallow slashes on the top of the loaf with a sharp knife (this helps control the rise).
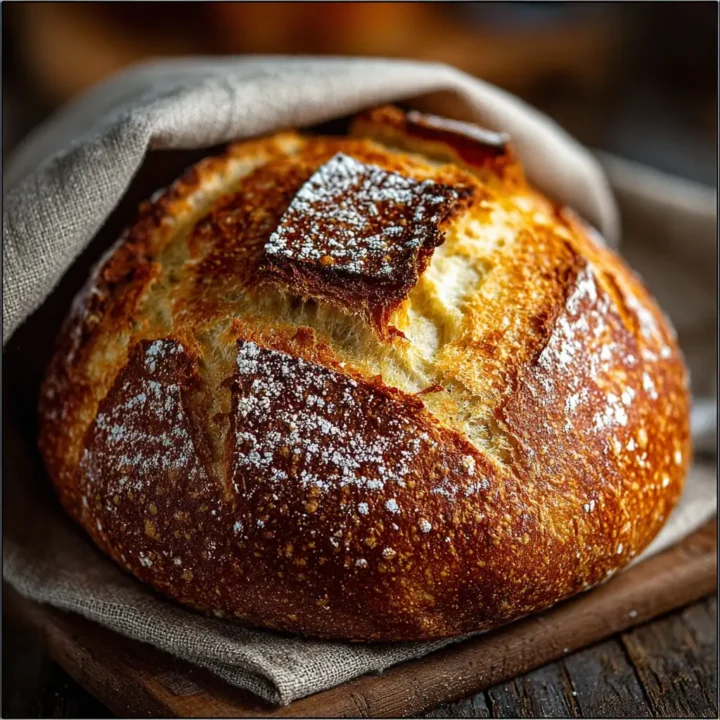
- Carefully transfer the loaf to the hot baking stone or sheet and bake for 25-30 minutes, or until the crust is golden brown and the bread sounds hollow when tapped on the bottom.

Nutritional Information
Here’s a quick overview of the nutritional benefits of Tasty Homemade Crusty Italian Bread (per slice, based on 12 slices):
| Nutrient | Amount per Slice |
|---|---|
| Calories | 130 |
| Protein | 4g |
| Carbohydrates | 26g |
| Dietary Fiber | 1g |
| Fat | 1.5g |
| Sodium | 150mg |
This bread is a great source of carbohydrates, making it an excellent energy booster for your day.
Healthier Alternatives for the Recipe
- Flour: Substitute half of the all-purpose flour with whole wheat flour for added fiber and nutrients.
- Yeast: Use instant yeast for a quicker rise.
- Sugar: Replace sugar with honey or maple syrup for a natural sweetener.
Serving Suggestions
Your Tasty Homemade Crusty Italian Bread can be served in various ways:
- As a Side: Pair it with soups or salads for a complete meal.
- For Sandwiches: Use it as a base for hearty sandwiches filled with meats, cheeses, and fresh veggies.
- Bruschetta: Toast slices and top them with diced tomatoes, basil, and balsamic vinegar for a delicious appetizer.
Common Mistakes to Avoid
- Not Measuring Ingredients Accurately: Use a kitchen scale for precise measurements, especially with flour.
- Skipping the Rising Time: Allowing the dough to rise properly is crucial for texture. Don’t rush this step!
- Opening the Oven Door Too Soon: This can cause a drop in temperature, affecting the crust. Wait until the baking time is nearly complete.
Storing Tips for the Recipe
- Room Temperature: Store the bread wrapped in a kitchen towel for up to 3 days.
- Freezing: For longer storage, slice the bread and freeze it in an airtight bag. It will last for up to 3 months. To enjoy, simply toast slices directly from the freezer.
Conclusion
Making Tasty Homemade Crusty Italian Bread is a rewarding experience that fills your home with irresistible aromas and creates a delicious addition to any meal. With simple ingredients and straightforward steps, you can enjoy this delightful bread at home. Try the recipe today and share your experience in the comments or subscribe for more delicious updates!
FAQs
Can I use whole wheat flour instead of all-purpose flour?
Yes, you can substitute up to half of the all-purpose flour with whole wheat flour for a healthier option.
What should I do if my dough doesn’t rise?
Ensure your yeast is fresh and the water temperature is warm (not hot). If the dough still doesn’t rise, consider finding a warmer spot for it to proof.
How can I tell when the bread is done baking?
The bread is done when it is golden brown and sounds hollow when tapped on the bottom. An internal temperature of about 190°F (88°C) is also a good indicator.
Tasty Homemade Crusty Italian Bread
Ingredients
- 4 cups all-purpose flour (or bread flour for a chewier texture)
- 1 ½ cups warm water (about 110°F or 43°C)
- 2 teaspoons active dry yeast
- 1 tablespoon sugar (to activate the yeast)
- 2 teaspoons salt (for flavor)
- 1 tablespoon olive oil (optional, for richness)
Instructions
Step 1: Activate the Yeast
In a small bowl, combine warm water, sugar, and active dry yeast. Stir gently and let it sit for about 5-10 minutes until it becomes frothy. This indicates that the yeast is active.
Step 2: Mix the Dough
In a large mixing bowl, combine the flour and salt. Make a well in the center and pour in the yeast mixture along with olive oil (if using).
Stir with a wooden spoon until the dough begins to come together.
Step 3: Knead the Dough
Transfer the dough to a floured surface and knead for about 10 minutes until it is smooth and elastic. If the dough is too sticky, sprinkle a little more flour as needed.
Step 4: First Rise
Place the kneaded dough in a lightly greased bowl, cover it with a damp cloth or plastic wrap, and let it rise in a warm place for about 1 hour, or until it has doubled in size.
Step 5: Shape the Loaf
After the first rise, punch down the dough to release air. Turn it out onto a floured surface and shape it into a round or oval loaf, depending on your preference.
Step 6: Second Rise
Place the shaped loaf on a parchment-lined baking sheet or in a proofing basket. Cover it again and let it rise for another 30-45 minutes.
Step 7: Preheat the Oven
Preheat your oven to 450°F (232°C). Place a baking stone or an inverted baking sheet in the oven to heat.
Step 8: Bake the Bread
Once the oven is hot, make a few shallow slashes on the top of the loaf with a sharp knife (this helps control the rise).
Carefully transfer the loaf to the hot baking stone or sheet and bake for 25-30 minutes, or until the crust is golden brown and the bread sounds hollow when tapped on the bottom.