Cheesecake Pops: A Fun and Delicious Treat
Introduction
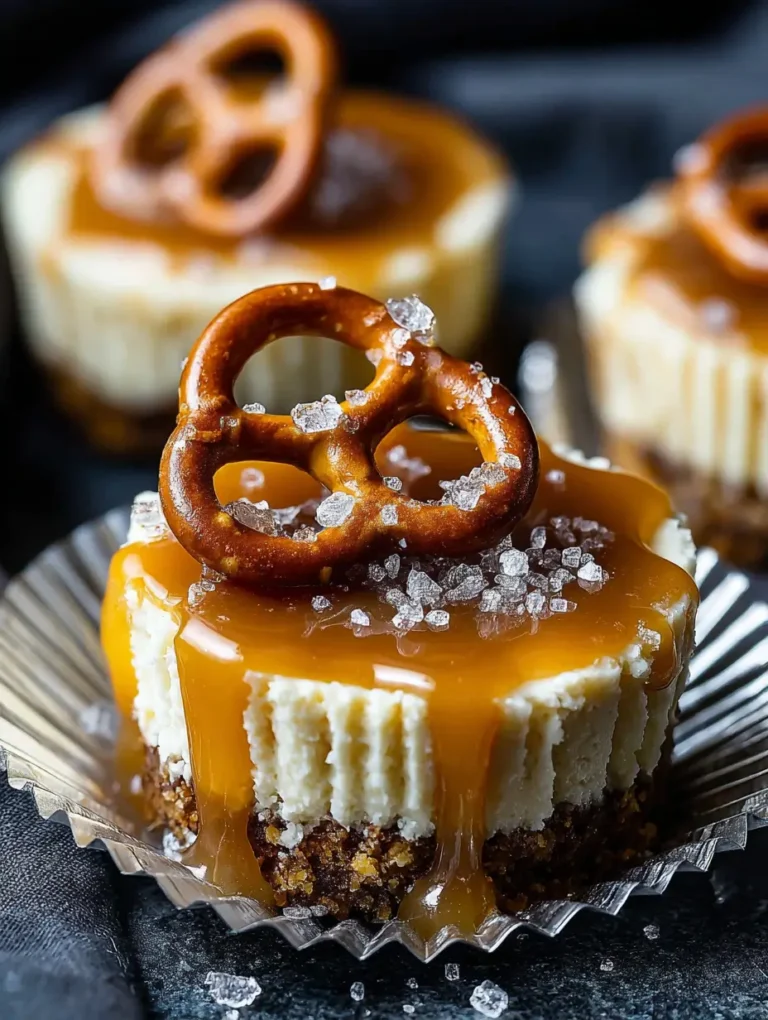
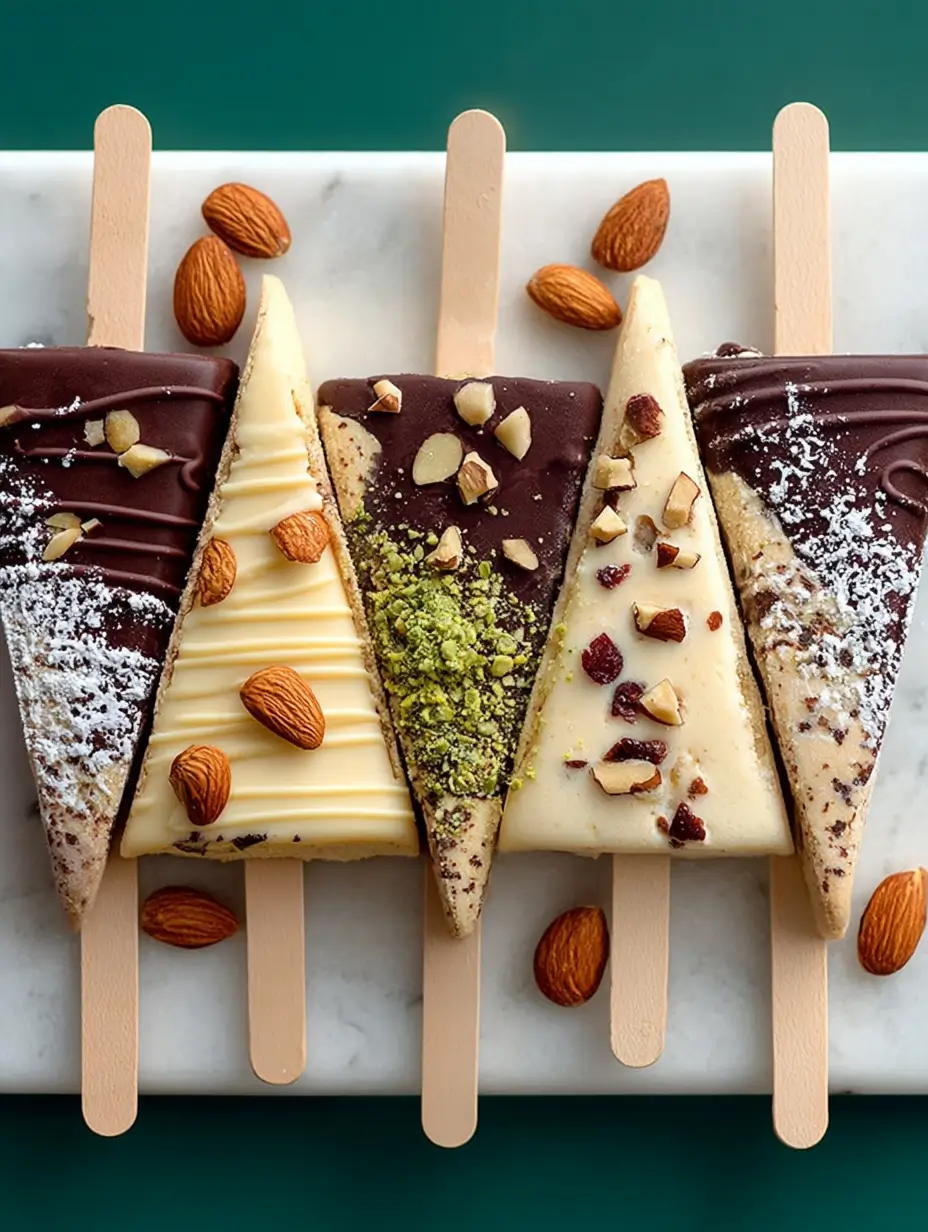
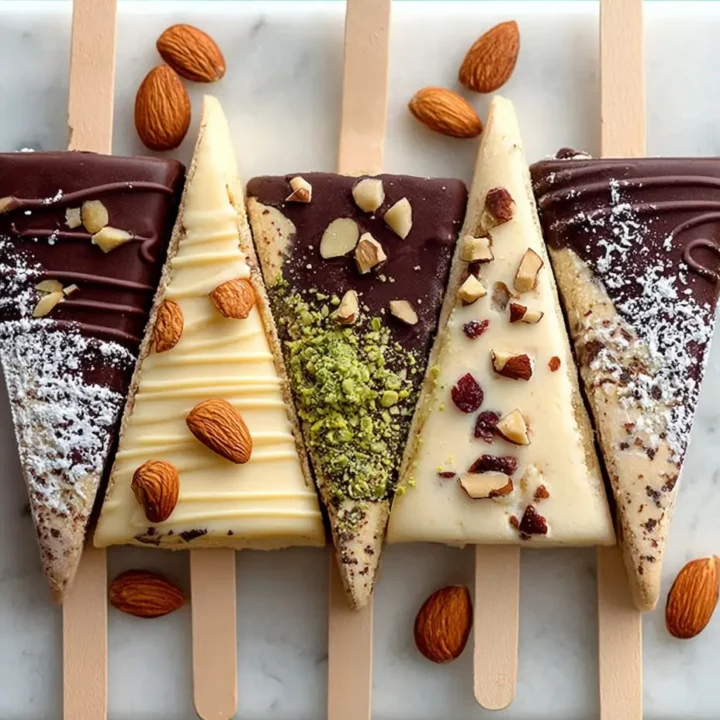
Cheesecake Pops are a delightful twist on traditional cheesecake, transforming this classic dessert into bite-sized treats on a stick. Perfect for parties, celebrations, or just a sweet snack, these pops are easy to make and can be customized with various toppings and flavors. Let’s dive into how to prepare these delicious cheesecake pops!
Ingredients List
For the Cheesecake Mixture:
- 8 oz cream cheese: Softened.
- 1/2 cup powdered sugar: For sweetness.
- 1 teaspoon vanilla extract: For flavor.
- 1/2 cup sour cream: For creaminess.
- 1/4 cup heavy cream: For a smooth texture.
For Coating:
- 1 cup chocolate chips: Milk, dark, or white chocolate.
- 1 tablespoon coconut oil: To help the chocolate melt smoothly.
For Toppings (Optional):
- Crushed graham crackers: For a classic cheesecake crust flavor.
- Sprinkles: For a fun and colorful touch.
- Chopped nuts: Such as almonds or walnuts.
- Drizzle of caramel or chocolate sauce: For added sweetness.
For Assembly:
- Lollipop sticks: For serving.
Timing
Preparing Cheesecake Pops takes about 4 hours, including chilling time:
- Preparation Time: 30 minutes
- Chilling Time: 3-4 hours
- Total Time: Approximately 4 hours and 30 minutes.
Step-by-Step Instructions
Step 1: Make the Cheesecake Mixture
- Beat the Cream Cheese: In a mixing bowl, beat 8 oz of softened cream cheese until smooth and creamy.
- Add Sugar and Flavorings: Gradually add 1/2 cup of powdered sugar, 1 teaspoon of vanilla extract, and 1/2 cup of sour cream. Mix until well combined.
- Incorporate Heavy Cream: Add 1/4 cup of heavy cream and mix until the mixture is smooth and fluffy.
Step 2: Form the Pops
- Scoop and Shape: Using a cookie scoop or your hands, scoop out portions of the cheesecake mixture and roll them into balls (about 1 inch in diameter).
- Insert Sticks: Place a lollipop stick into each cheesecake ball, ensuring it goes in about halfway.
- Chill: Place the cheesecake pops on a baking sheet lined with parchment paper and refrigerate for 3-4 hours or until firm.
Step 3: Prepare the Coating
- Melt Chocolate: In a microwave-safe bowl, combine 1 cup of chocolate chips and 1 tablespoon of coconut oil. Microwave in 30-second intervals, stirring in between, until fully melted and smooth.
- Cool Slightly: Let the melted chocolate cool for a few minutes before dipping.
Step 4: Coat the Pops
- Dip Cheesecake Pops: Remove the cheesecake pops from the refrigerator. Dip each pop into the melted chocolate, ensuring it’s fully coated.
- Add Toppings: Before the chocolate sets, sprinkle crushed graham crackers, sprinkles, or chopped nuts on top if desired.
- Place on Baking Sheet: Return the coated pops to the parchment-lined baking sheet.
Step 5: Chill Again
- Set the Chocolate: Place the coated cheesecake pops back in the refrigerator for about 30 minutes to allow the chocolate to set.
Step 6: Serve
- Enjoy: Once the chocolate has hardened, your cheesecake pops are ready to serve! Enjoy these delightful treats at room temperature or chilled.
Notes
- Storage: Leftover cheesecake pops can be stored in an airtight container in the refrigerator for up to 1 week.
- Variations: Experiment with different flavors by adding fruit puree to the cheesecake mixture or using flavored chocolate for coating.
- Common Mistakes: Ensure the cheesecake mixture is firm enough before inserting the sticks to prevent them from falling out.
Nutritional Information
Here’s a breakdown of the nutritional content per cheesecake pop (based on 12 servings):
| Nutrient | Amount per Serving |
|---|---|
| Calories | 150 |
| Protein | 2g |
| Fat | 10g |
| Carbohydrates | 14g |
| Sugar | 8g |
Note: Nutritional values may vary based on specific brands and ingredient choices.
Healthier Alternatives for the Recipe
To make your Cheesecake Pops a bit healthier, consider these modifications:
- Use Low-Fat Cream Cheese: Substitute regular cream cheese with low-fat or Neufchâtel cheese.
- Reduce Sugar: Cut down on the powdered sugar to lower the overall sweetness.
- Use Greek Yogurt: Replace sour cream with Greek yogurt for added protein and a tangy flavor.
Serving Suggestions
Enhance your Cheesecake Pops experience with these serving suggestions:
- Serve with Dipping Sauces: Offer chocolate or caramel sauce for dipping.
- Display Creatively: Arrange pops in a decorative container or stand for parties.
- Pair with Fruit: Serve alongside fresh fruit for a refreshing contrast.
Common Mistakes to Avoid
- Not Chilling Long Enough: Ensure the cheesecake mixture is thoroughly chilled before shaping and coating.
- Overheating the Chocolate: Be careful not to overheat the chocolate when melting, as it can seize.
- Not Coating Quickly: Work quickly when coating the pops to prevent the chocolate from hardening before you can add toppings.
Storing Tips for the Recipe
- Refrigeration: Store leftovers in an airtight container in the refrigerator for up to 1 week.
- Freezing: Cheesecake pops can be frozen for up to 2 months. Thaw in the refrigerator before serving.
- Prepping Ahead: You can prepare the cheesecake mixture and form the pops a day in advance for quick assembly.
Conclusion
In summary, Cheesecake Pops are a fun and delicious way to enjoy cheesecake in a portable form. Perfect for parties or a sweet snack, these pops are sure to be a hit. Give this recipe a try, and don’t forget to share your feedback in the comments or subscribe for more delicious updates!
FAQs
Can I use flavored cream cheese?
Yes! You can use flavored cream cheese, such as strawberry or chocolate, to enhance the flavor of your pops.
What can I substitute for lollipop sticks?
You can use pretzel sticks or even toothpicks for smaller bites.
How do I know when the cheesecake mixture is ready?
The mixture should be smooth and creamy without lumps.
Can I make these pops vegan?
Yes! Use vegan cream cheese and dairy-free chocolate for a vegan version.
What can I serve with cheesecake pops?
These pops pair well with coffee, milk, or even a fruit salad for a refreshing contrast.
Now that you have all the details, it’s time to get making your Cheesecake Pops and enjoy the delightful flavors they bring to your table!
Cheesecake Pops: A Fun and Delicious Treat
Ingredients
- For the Cheesecake Mixture:
- 8 oz cream cheese: Softened.
- 1/2 cup powdered sugar: For sweetness.
- 1 teaspoon vanilla extract: For flavor.
- 1/2 cup sour cream: For creaminess.
- 1/4 cup heavy cream: For a smooth texture.
- For Coating:
- 1 cup chocolate chips: Milk, dark, or white chocolate.
- 1 tablespoon coconut oil: To help the chocolate melt smoothly.
- For Toppings (Optional):
- Crushed graham crackers: For a classic cheesecake crust flavor.
- Sprinkles: For a fun and colorful touch.
- Chopped nuts: Such as almonds or walnuts.
- Drizzle of caramel or chocolate sauce: For added sweetness.
- For Assembly:
- Lollipop sticks: For serving.
Instructions
- Beat the Cream Cheese: In a mixing bowl, beat 8 oz of softened cream cheese until smooth and creamy.
- Add Sugar and Flavorings: Gradually add 1/2 cup of powdered sugar, 1 teaspoon of vanilla extract, and 1/2 cup of sour cream. Mix until well combined.
- Incorporate Heavy Cream: Add 1/4 cup of heavy cream and mix until the mixture is smooth and fluffy.
- Scoop and Shape: Using a cookie scoop or your hands, scoop out portions of the cheesecake mixture and roll them into balls (about 1 inch in diameter).
- Insert Sticks: Place a lollipop stick into each cheesecake ball, ensuring it goes in about halfway.
- Chill: Place the cheesecake pops on a baking sheet lined with parchment paper and refrigerate for 3-4 hours or until firm.
- Melt Chocolate: In a microwave-safe bowl, combine 1 cup of chocolate chips and 1 tablespoon of coconut oil. Microwave in 30-second intervals, stirring in between, until fully melted and smooth.
- Cool Slightly: Let the melted chocolate cool for a few minutes before dipping.
- Dip Cheesecake Pops: Remove the cheesecake pops from the refrigerator. Dip each pop into the melted chocolate, ensuring it’s fully coated.
- Add Toppings: Before the chocolate sets, sprinkle crushed graham crackers, sprinkles, or chopped nuts on top if desired.
- Place on Baking Sheet: Return the coated pops to the parchment-lined baking sheet.
- Set the Chocolate: Place the coated cheesecake pops back in the refrigerator for about 30 minutes to allow the chocolate to set.
- Enjoy: Once the chocolate has hardened, your cheesecake pops are ready to serve! Enjoy these delightful treats at room temperature or chilled.
Step 1: Make the Cheesecake Mixture
Step 2: Form the Pops
Step 3: Prepare the Coating
Step 4: Coat the Pops
Step 5: Chill Again
Step 6: Serve
Notes
- Storage: Leftover cheesecake pops can be stored in an airtight container in the refrigerator for up to 1 week.
- Variations: Experiment with different flavors by adding fruit puree to the cheesecake mixture or using flavored chocolate for coating.
- Common Mistakes: Ensure the cheesecake mixture is firm enough before inserting the sticks to prevent them from falling out.