Vanilla Pudding Cups: A Simple and Creamy Dessert
Introduction
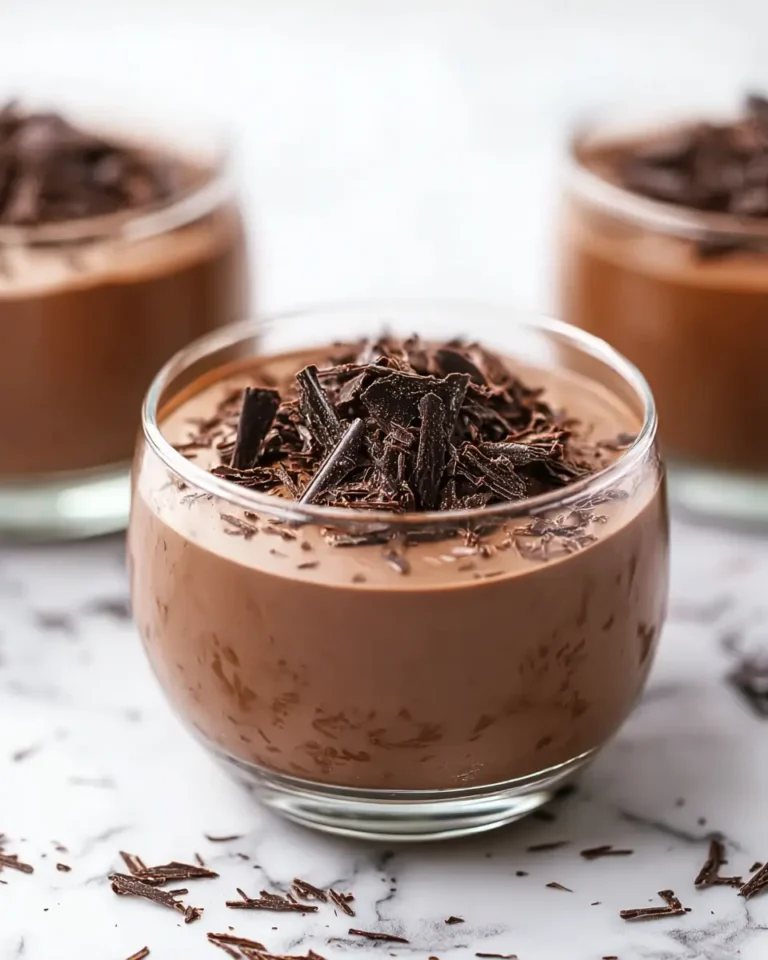
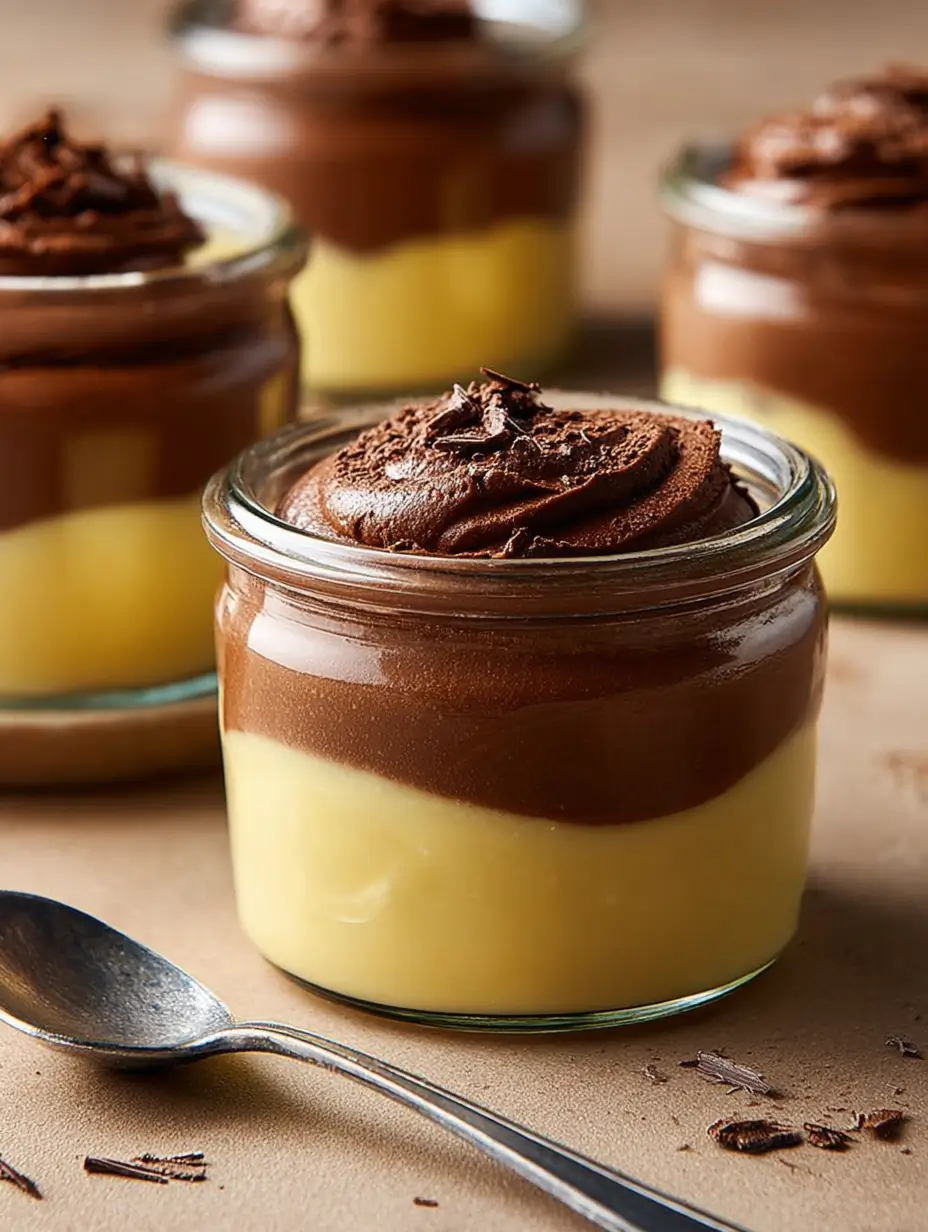
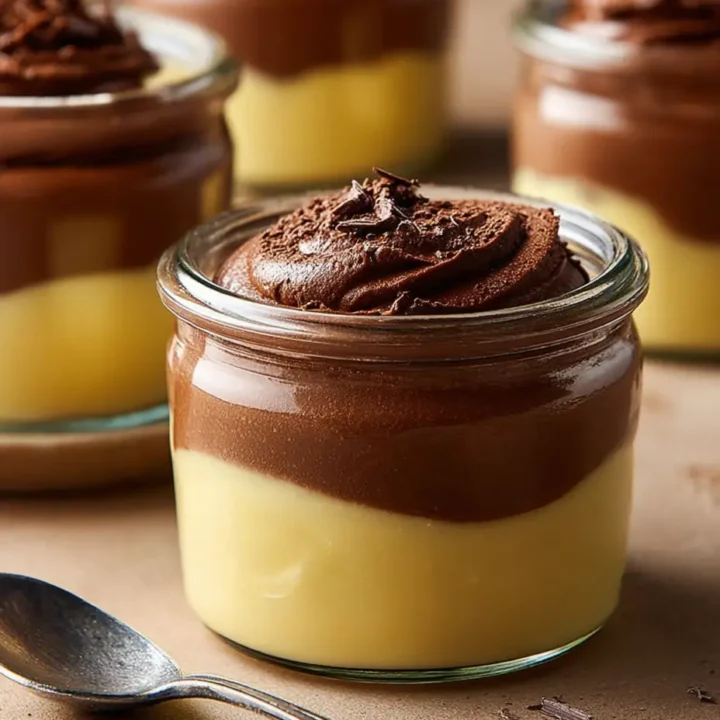
Vanilla Pudding Cups are a delightful, creamy dessert that can be enjoyed on their own or topped with various garnishes. This easy-to-make pudding is perfect for parties, family gatherings, or a sweet treat after dinner. With just a few ingredients, you can whip up a batch of delicious vanilla pudding cups that everyone will love. Let’s dive into how to make this classic dessert!
Ingredients List
For the Vanilla Pudding:
- 2 cups whole milk: For creaminess.
- 1/2 cup granulated sugar: For sweetness.
- 1/4 cup cornstarch: For thickening.
- 1/4 teaspoon salt: To enhance flavor.
- 2 teaspoons vanilla extract: For flavor.
- 2 tablespoons unsalted butter: For richness.
For Topping (optional):
- Whipped cream: For garnish.
- Chocolate shavings: For decoration.
- Fresh berries: Such as strawberries or blueberries.
- Crushed cookies: Such as graham crackers or Oreos.
Timing
Preparing Vanilla Pudding Cups takes about 30 minutes:
- Preparation Time: 10 minutes
- Cooking Time: 10 minutes
- Chilling Time: 10 minutes
- Total Time: Approximately 30 minutes.
Step-by-Step Instructions
Step 1: Prepare the Pudding Mixture
- Combine Dry Ingredients: In a medium saucepan, whisk together 1/4 cup cornstarch, 1/2 cup granulated sugar, and 1/4 teaspoon salt until well combined.
- Add Milk: Gradually whisk in 2 cups of whole milk until smooth and free of lumps.
Step 2: Cook the Pudding
- Heat Mixture: Place the saucepan over medium heat and cook the mixture, stirring constantly, until it begins to thicken and bubble. This should take about 5-7 minutes.
- Add Vanilla and Butter: Once thickened, remove the saucepan from heat. Stir in 2 teaspoons of vanilla extract and 2 tablespoons of unsalted butter until the butter is melted and fully incorporated.
Step 3: Chill the Pudding
- Transfer to Cups: Pour the pudding into individual serving cups or a large bowl. Cover the cups with plastic wrap, pressing it directly onto the surface of the pudding to prevent a skin from forming.
- Chill: Refrigerate the pudding for at least 10 minutes to cool and set.
Step 4: Serve
- Garnish: Once chilled, remove the pudding from the refrigerator. Top with whipped cream, chocolate shavings, fresh berries, or crushed cookies as desired.
- Enjoy: Serve immediately and enjoy your delicious vanilla pudding cups!
Notes
- Storage: Leftover vanilla pudding can be stored in an airtight container in the refrigerator for up to 3 days.
- Variations: Feel free to add different flavors like chocolate, butterscotch, or almond by substituting the vanilla extract.
- Common Mistakes: Make sure to stir constantly while cooking to prevent the pudding from sticking to the bottom of the pan and burning.
Nutritional Information
Here’s a rough breakdown of the nutritional content per serving (based on 4 servings):
| Nutrient | Amount per Serving |
|---|---|
| Calories | 180 |
| Protein | 4g |
| Fat | 7g |
| Carbohydrates | 26g |
| Sugar | 14g |
Note: Nutritional values may vary based on specific brands and ingredient choices.
Healthier Alternatives for the Recipe
To make your Vanilla Pudding Cups a bit healthier, consider these modifications:
- Use Low-Fat Milk: Substitute whole milk with low-fat or almond milk.
- Reduce Sugar: Decrease the amount of sugar or use a natural sweetener like honey or maple syrup.
- Add Greek Yogurt: Mix in some Greek yogurt for added protein and creaminess.
Serving Suggestions
Enhance your Vanilla Pudding Cups experience with these serving suggestions:
- Layered Parfaits: Layer the pudding with fresh fruits and granola for a delicious parfait.
- Chocolate Sauce: Drizzle chocolate sauce over the top for extra indulgence.
- Cookie Crust: Create a cookie crust at the bottom of the cups for added texture.
Common Mistakes to Avoid
- Not Whisking Constantly: Stir constantly while cooking to avoid lumps and ensure even thickening.
- Overcooking the Pudding: Remove from heat as soon as it thickens to prevent it from becoming too thick or grainy.
- Skipping Chilling Time: Allow the pudding to chill properly for the best texture and flavor.
Storing Tips for the Recipe
- Refrigeration: Store leftover pudding in an airtight container for up to 3 days.
- Prepping Ahead: You can prepare the pudding a day in advance and store it in the refrigerator until ready to serve.
Conclusion
In summary, Vanilla Pudding Cups are a simple, creamy dessert that can be made quickly and enjoyed by all. With their rich vanilla flavor and endless topping possibilities, these pudding cups are sure to become a favorite. Give this recipe a try, and don’t forget to share your feedback in the comments or subscribe for more delicious updates!
FAQs
Can I use a different type of milk?
Yes! You can use almond milk, soy milk, or any other milk alternative for a dairy-free version.
How do I know when the pudding is thick enough?
The pudding should coat the back of a spoon and hold its shape when you run your finger through it.
Can I make this pudding in advance?
Absolutely! You can prepare the pudding a day ahead and keep it in the refrigerator until ready to serve.
What can I serve with vanilla pudding?
Vanilla pudding pairs well with fresh fruit, whipped cream, or crumbled cookies.
Can I freeze the pudding?
While it’s best served fresh, you can freeze the pudding, but the texture may change upon thawing.
Now that you have all the details, it’s time to get making your Vanilla Pudding Cups! Enjoy the delicious flavors they bring to your table!
Vanilla Pudding Cups: A Simple and Creamy Dessert
Ingredients
- For the Vanilla Pudding:
- 2 cups whole milk: For creaminess.
- 1/2 cup granulated sugar: For sweetness.
- 1/4 cup cornstarch: For thickening.
- 1/4 teaspoon salt: To enhance flavor.
- 2 teaspoons vanilla extract: For flavor.
- 2 tablespoons unsalted butter: For richness.
- For Topping (optional):
- Whipped cream: For garnish.
- Chocolate shavings: For decoration.
- Fresh berries: Such as strawberries or blueberries.
- Crushed cookies: Such as graham crackers or Oreos.
Instructions
- Combine Dry Ingredients: In a medium saucepan, whisk together 1/4 cup cornstarch, 1/2 cup granulated sugar, and 1/4 teaspoon salt until well combined.
- Add Milk: Gradually whisk in 2 cups of whole milk until smooth and free of lumps.
- Heat Mixture: Place the saucepan over medium heat and cook the mixture, stirring constantly, until it begins to thicken and bubble. This should take about 5-7 minutes.
- Add Vanilla and Butter: Once thickened, remove the saucepan from heat. Stir in 2 teaspoons of vanilla extract and 2 tablespoons of unsalted butter until the butter is melted and fully incorporated.
- Transfer to Cups: Pour the pudding into individual serving cups or a large bowl. Cover the cups with plastic wrap, pressing it directly onto the surface of the pudding to prevent a skin from forming.
- Chill: Refrigerate the pudding for at least 10 minutes to cool and set.
- Garnish: Once chilled, remove the pudding from the refrigerator. Top with whipped cream, chocolate shavings, fresh berries, or crushed cookies as desired.
- Enjoy: Serve immediately and enjoy your delicious vanilla pudding cups!
Step 1: Prepare the Pudding Mixture
Step 2: Cook the Pudding
Step 3: Chill the Pudding
Step 4: Serve
Notes
- Storage: Leftover vanilla pudding can be stored in an airtight container in the refrigerator for up to 3 days.
- Variations: Feel free to add different flavors like chocolate, butterscotch, or almond by substituting the vanilla extract.
- Common Mistakes: Make sure to stir constantly while cooking to prevent the pudding from sticking to the bottom of the pan and burning.