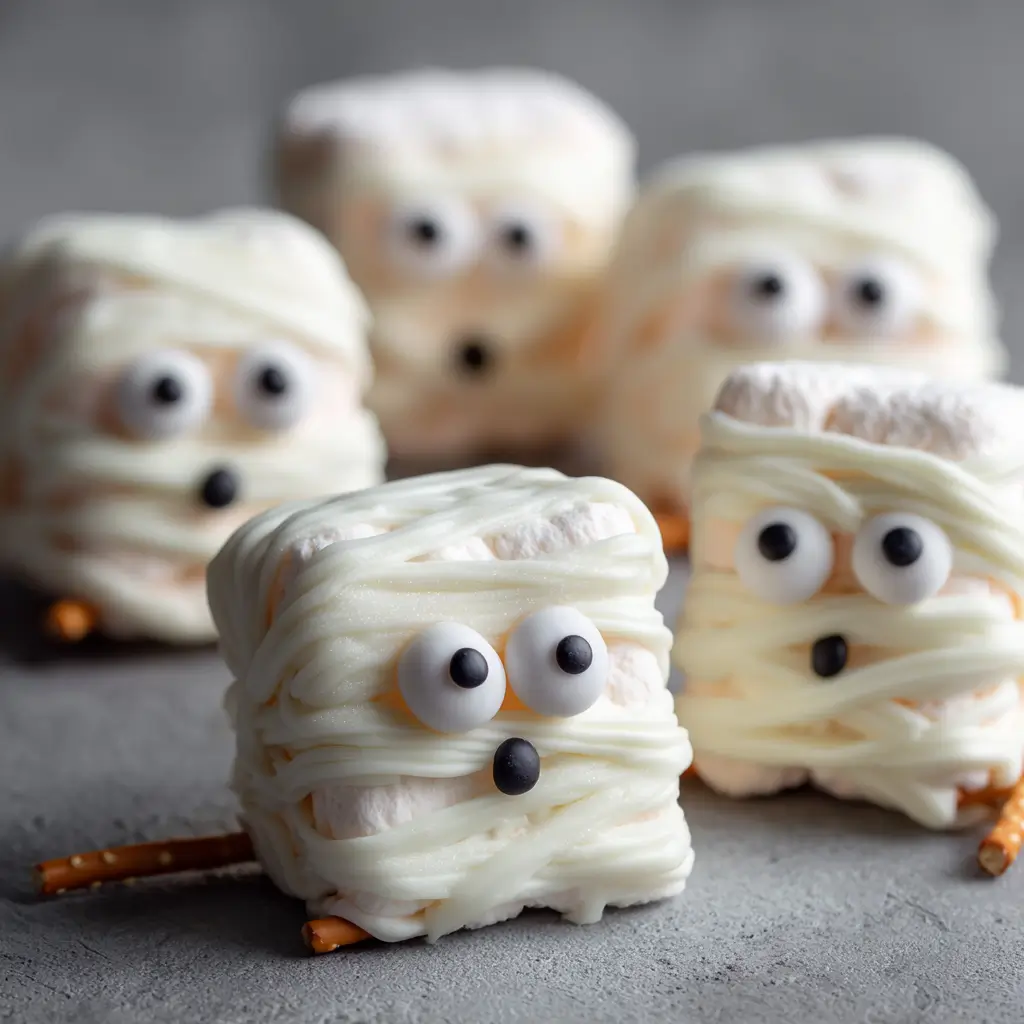
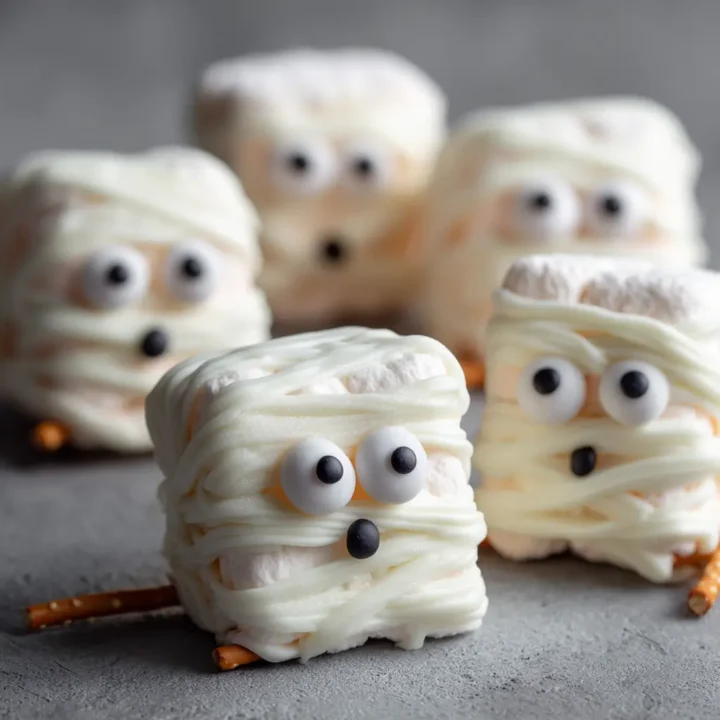
Halloween Mummy Treats: A Spooktacular No-Bake Delight
Are you looking for a fun and easy Halloween treat that will impress both kids and adults alike? Did you know that over 70% of parents prefer no-bake recipes for Halloween festivities? If you’re among them, let me introduce you to Halloween Mummy Treats! These adorable treats combine the sweetness of marshmallows with the whimsical appearance of mummies, making them a perfect addition to your Halloween celebrations.
Ingredients List
To make these delightful Halloween Mummy Treats, you’ll need the following ingredients:
- Large marshmallows (1 package)
- White chocolate melting wafers (1 bag)
- Candy eyes (for decoration)
- Edible black gel (for detailing)
- Pretzel sticks (for the mummy’s arms)
Suggested Substitutions:
- White Chocolate Melting Wafers: Use dark chocolate or milk chocolate for a different flavor.
- Marshmallows: Try using mini marshmallows for smaller mummies.
- Candy Eyes: You can make your own eyes with chocolate chips or colored icing.
Step-by-Step Instructions
Step 1: Prepare Your Ingredients
Gather all your ingredients and set up your workspace. This will streamline the process and make it more enjoyable!
Step 2: Melt the Chocolate
In a microwave-safe bowl, melt the white chocolate melting wafers according to the package instructions. Stir until smooth and creamy, ensuring there are no lumps.
Step 3: Coat the Marshmallows
Using a fork or skewer, dip each marshmallow into the melted chocolate, ensuring it is fully coated. Allow any excess chocolate to drip off before placing the marshmallow on a parchment-lined baking sheet.
Step 4: Create the Mummy Wrappings
While the chocolate is still wet, use a fork to drizzle more melted chocolate over the coated marshmallows. This will create the appearance of mummy wrappings. Be playful with the drizzling to give each mummy a unique look!
Step 5: Add the Eyes
Before the chocolate sets, place two candy eyes on each marshmallow to give your mummies a spooky expression. You can also use edible black gel to add a mouth or other details if desired.
Step 6: Chill to Set
Place the baking sheet in the refrigerator for about 10 minutes to allow the chocolate to harden. This step ensures that your mummies hold their shape and are ready to be served.

Nutritional Information
Here’s a breakdown of the nutritional information for one Halloween Mummy Treat (based on 12 servings):
| Nutrient | Amount per Serving |
|---|---|
| Calories | 120 |
| Protein | 1g |
| Carbohydrates | 18g |
| Fat | 6g |
| Sugar | 10g |
These treats are a fun indulgence, perfect for the Halloween season!
Healthier Alternatives for the Recipe
If you’re looking to make your Halloween Mummy Treats a bit healthier, consider these modifications:
- Use Dark Chocolate: Dark chocolate has less sugar and adds a rich flavor.
- Sugar-Free Marshmallows: Opt for sugar-free marshmallows to reduce the overall sugar content.
- Add Nuts: Incorporate crushed nuts into the chocolate coating for added texture and nutrition.
Serving Suggestions
These Halloween Mummy Treats can be served in various fun ways:
- On a Halloween Platter: Arrange them on a spooky-themed platter with other Halloween snacks.
- As Party Favors: Package them in clear bags tied with orange or black ribbon for a festive touch.
- With a Dipping Sauce: Serve with a side of caramel or chocolate sauce for dipping.
Common Mistakes to Avoid
Here are some common pitfalls when making Halloween Mummy Treats and how to avoid them:
- Using Cold Marshmallows: Ensure your marshmallows are at room temperature for better chocolate adherence.
- Overheating the Chocolate: Be careful not to overheat the chocolate, as it can become grainy. Melt in short intervals and stir frequently.
- Skipping the Chilling Step: Don’t skip the chilling time! It’s essential for the chocolate to set properly.
Storing Tips for the Recipe
To keep your Halloween Mummy Treats fresh, follow these storage tips:
- Refrigeration: Store in an airtight container in the refrigerator for up to 5 days.
- Freezing: For longer storage, freeze the mummies in a single layer, then transfer to a freezer-safe bag. They can last up to 2 months. Thaw in the refrigerator before serving.
Conclusion
In conclusion, Halloween Mummy Treats are a fun and easy no-bake dessert that will delight your guests and add a festive touch to your Halloween celebrations. With minimal effort and maximum fun, these treats are sure to be a hit. Give this recipe a try, and don’t forget to share your experience in the comments or subscribe for more delicious updates!
FAQs
Can I make these treats ahead of time?
Yes! You can prepare them a day in advance and store them in the refrigerator until you’re ready to serve.
Are these treats suitable for kids?
Absolutely! These mummy treats are kid-friendly and can be a fun activity to make together.
Can I use different colors for the eyes?
Yes! Feel free to use colored candy or icing to match your Halloween theme.
Halloween Mummy Treats:
Ingredients
- Large marshmallows (1 package)
- White chocolate melting wafers (1 bag)
- Candy eyes (for decoration)
- Edible black gel (for detailing)
- Pretzel sticks (for the mummy's arms)
- Suggested Substitutions:
- White Chocolate Melting Wafers: Use dark chocolate or milk chocolate for a different flavor.
- Marshmallows: Try using mini marshmallows for smaller mummies.
- Candy Eyes: You can make your own eyes with chocolate chips or colored icing.
Instructions
Step 1: Prepare Your Ingredients
Gather all your ingredients and set up your workspace. This will streamline the process and make it more enjoyable!
Step 2: Melt the Chocolate
In a microwave-safe bowl, melt the white chocolate melting wafers according to the package instructions. Stir until smooth and creamy, ensuring there are no lumps.
Step 3: Coat the Marshmallows
Using a fork or skewer, dip each marshmallow into the melted chocolate, ensuring it is fully coated. Allow any excess chocolate to drip off before placing the marshmallow on a parchment-lined baking sheet.
Step 4: Create the Mummy Wrappings
While the chocolate is still wet, use a fork to drizzle more melted chocolate over the coated marshmallows. This will create the appearance of mummy wrappings. Be playful with the drizzling to give each mummy a unique look!
Step 5: Add the Eyes
Before the chocolate sets, place two candy eyes on each marshmallow to give your mummies a spooky expression. You can also use edible black gel to add a mouth or other details if desired.
Step 6: Chill to Set
Place the baking sheet in the refrigerator for about 10 minutes to allow the chocolate to harden. This step ensures that your mummies hold their shape and are ready to be served.


