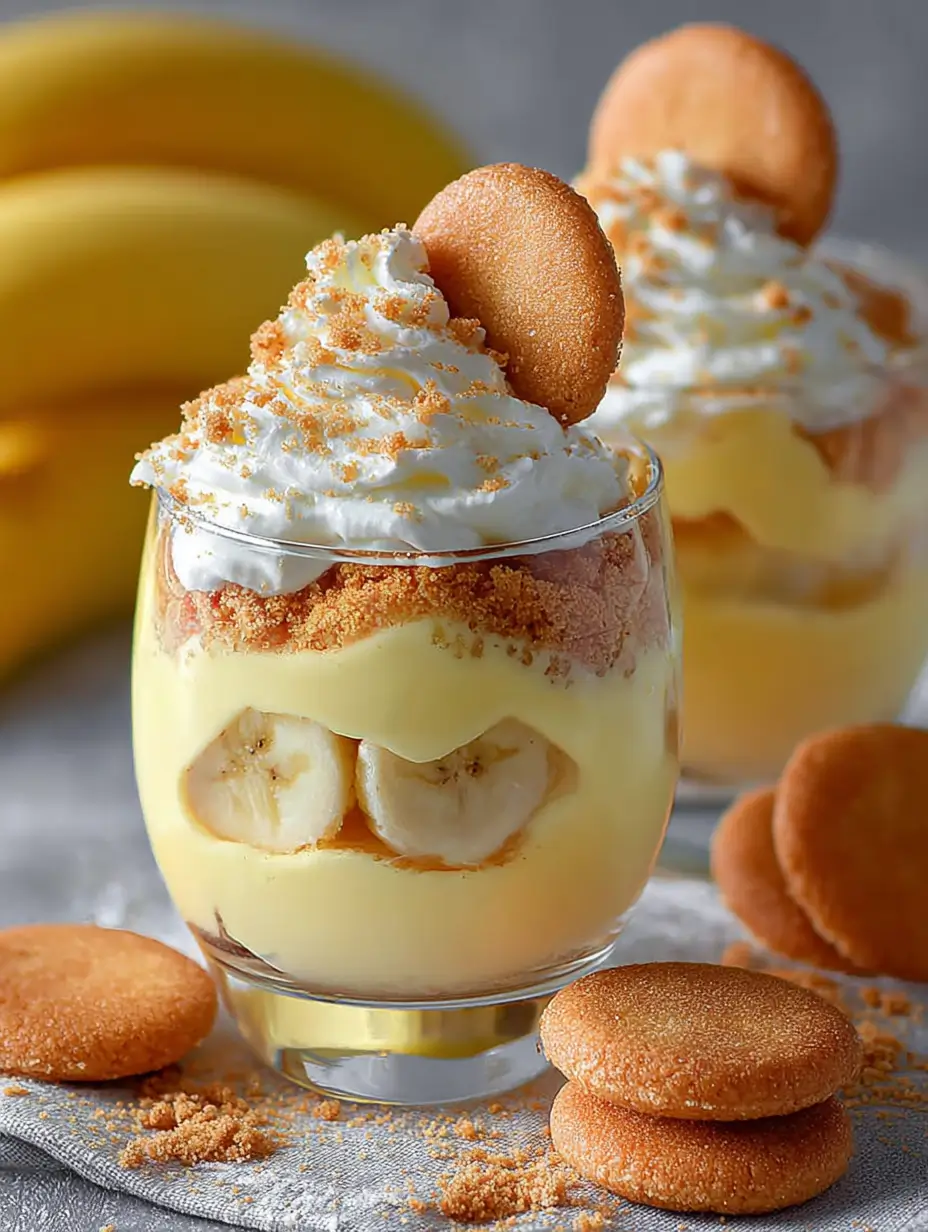
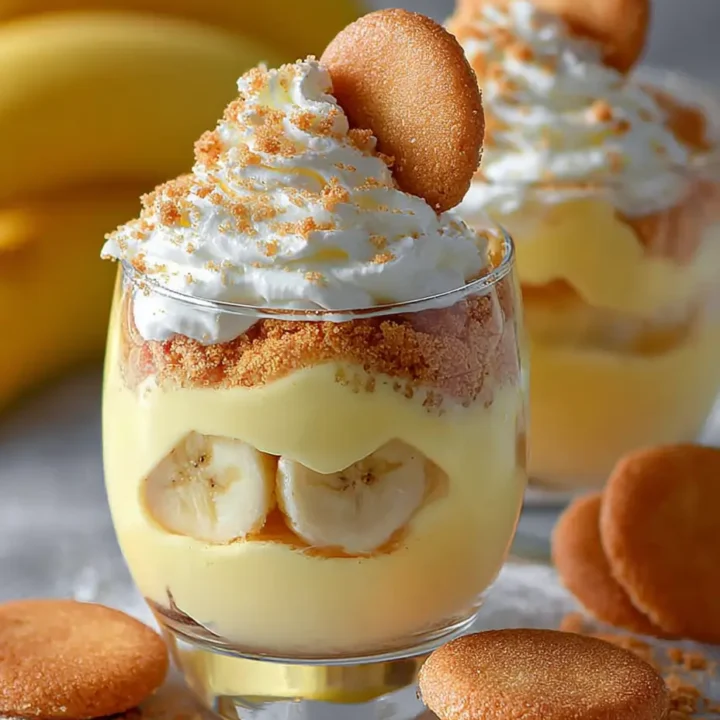
No-Bake Banana Pudding Cups: A Simple and Delicious Dessert
Are you craving a sweet treat that’s both easy to make and incredibly satisfying? Look no further! In this post, we’ll explore how to create delightful no-bake banana pudding cups. This dessert is perfect for warm days when you want something refreshing without turning on the oven. With layers of creamy pudding, fresh bananas, and crunchy cookies, these cups are sure to please everyone!
Ingredients List
To make these delicious no-bake banana pudding cups, you will need the following ingredients:
For the Pudding:
- 2 cups whole milk
- 1 package (3.4 oz) instant vanilla pudding mix
- 1 cup heavy whipping cream
- 1/4 cup powdered sugar
- 1 teaspoon vanilla extract
For the Assembly:
- 3-4 ripe bananas (sliced)
- 1 package (12 oz) vanilla wafers or graham crackers
- Whipped cream (for topping)
- Fresh mint leaves (for garnish, optional)
Substitutions:
- Milk: Almond or oat milk can be used for a dairy-free version.
- Pudding Mix: Use banana-flavored pudding for an extra banana kick.
- Cookies: Gluten-free cookies can be substituted for those with dietary restrictions.
Timing
Preparing these no-bake banana pudding cups will take approximately 20 minutes, with a chilling time of about 2 hours. Here’s the breakdown:
- Preparation Time: 20 minutes
- Chilling Time: 2 hours
Step-by-Step Instructions
Step 1: Prepare the Pudding
- In a medium bowl, whisk together the milk and instant vanilla pudding mix until smooth. Let it sit for about 5 minutes to thicken.
- In another bowl, whip the heavy cream with powdered sugar and vanilla extract until soft peaks form.
- Gently fold the whipped cream into the pudding mixture until well combined.
Step 2: Assemble the Cups
- In serving cups or bowls, start with a layer of vanilla wafers or graham crackers at the bottom.
- Add a layer of the pudding mixture over the cookies.
- Place a layer of sliced bananas on top of the pudding.
- Repeat the layers until the cups are filled, finishing with a layer of pudding on top.
Step 3: Chill and Serve
- Cover the cups with plastic wrap and refrigerate for at least 2 hours to allow the flavors to meld.
- Before serving, top with whipped cream and garnish with fresh mint leaves if desired.
Notes
- Tips: For added flavor, consider adding a sprinkle of cinnamon or nutmeg between the layers.
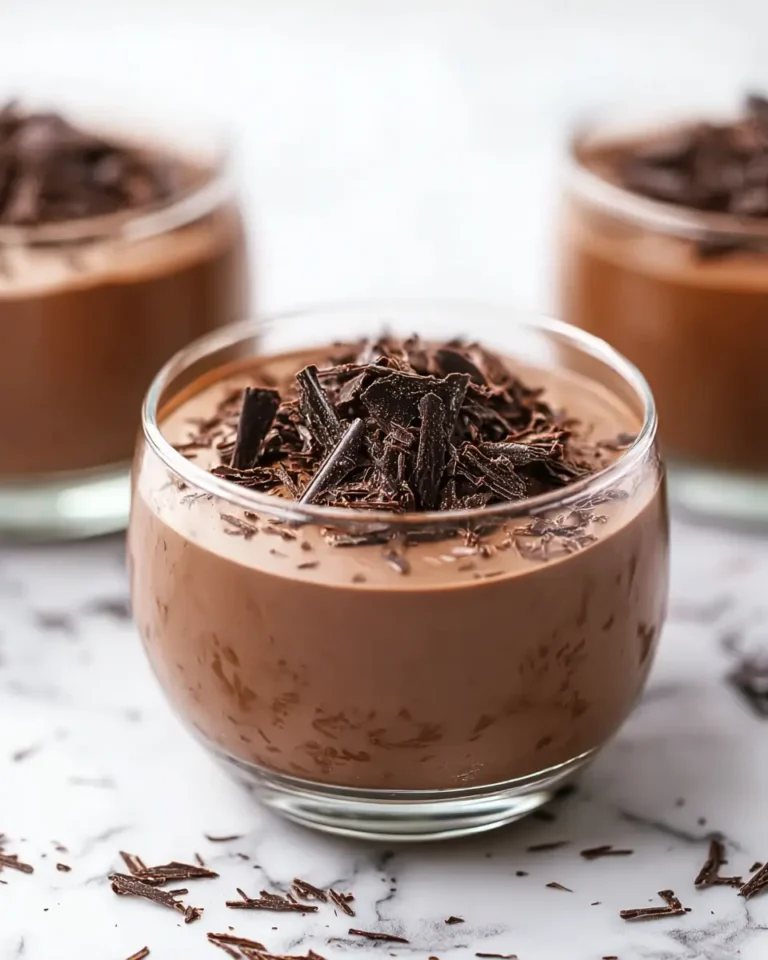
- Substitutions: Use chocolate wafers for a chocolate twist on this classic dessert.
- Storage Instructions: Store any leftovers in the refrigerator for up to 2 days.
Nutritional Information
Here’s a breakdown of the nutritional information per serving (assuming 6 servings):
- Calories: 250
- Total Fat: 12g
- Saturated Fat: 7g
- Cholesterol: 40mg
- Sodium: 150mg
- Total Carbohydrates: 35g
- Dietary Fiber: 1g
- Sugars: 15g
- Protein: 3g
Healthier Alternatives for the Recipe
If you want to make these no-bake banana pudding cups a bit healthier, consider the following modifications:
- Reduce Sugar: Use less powdered sugar or a sugar substitute to lower the sweetness.
- Add Greek Yogurt: Substitute some of the heavy cream with Greek yogurt for added protein and creaminess.
- Use Whole Grain Cookies: Opt for whole grain or low-sugar cookies for a healthier base.
Serving Suggestions
These no-bake banana pudding cups are versatile and can be served in various ways:
- Serve in individual cups for a fun party dessert.
- Layer in a large trifle dish for a beautiful presentation at gatherings.
- Pair with fresh fruit skewers for a colorful dessert platter.
Common Mistakes to Avoid
- Using Overripe Bananas: Choose ripe but firm bananas to prevent them from becoming mushy in the pudding.
- Not Chilling Long Enough: Allowing the pudding to chill is crucial for the best flavor and texture.
- Overmixing the Whipped Cream: Gently fold the whipped cream into the pudding to maintain its light and airy texture.
Storing Tips for the Recipe
- Refrigeration: Store any leftovers in the refrigerator for up to 2 days. The bananas may brown slightly, but the flavor will remain delicious.
- Prepping Ahead: You can prepare the pudding mixture a day in advance and assemble the cups just before serving.
Conclusion
In summary, these no-bake banana pudding cups are a delightful and easy dessert that everyone will love. They combine creamy pudding, fresh bananas, and crunchy cookies for a satisfying treat. Try this recipe today, and don’t forget to share your feedback in the comments or leave a review! Subscribe for more delicious recipes and updates!
FAQs
Q1: Can I make this dessert ahead of time?
A: Yes! You can prepare the pudding mixture and layer the cups a day in advance. Just add the bananas shortly before serving to keep them fresh.
Q2: What if I can’t find instant pudding mix?
A: You can make a homemade pudding using cornstarch, sugar, milk, and vanilla, but it will require cooking and cooling.
Q3: How do I prevent the bananas from browning?
A: You can toss the banana slices in a little lemon juice to help prevent browning.
Q4: Can I use flavored pudding mixes?
A: Absolutely! Chocolate or banana-flavored pudding mixes work great for a fun twist.
Q5: How should I store leftovers?
A: Store leftovers in an airtight container in the refrigerator for up to 2 days.
With this guide, you’re ready to create your own no-bake banana pudding cups that are sure to impress! Enjoy your delicious creation!
No-Bake Banana Pudding Cups: A Simple and Delicious Dessert
Ingredients
- For the Pudding:
- 2 cups whole milk
- 1 package (3.4 oz) instant vanilla pudding mix
- 1 cup heavy whipping cream
- 1/4 cup powdered sugar
- 1 teaspoon vanilla extract
- For the Assembly:
- 3-4 ripe bananas (sliced)
- 1 package (12 oz) vanilla wafers or graham crackers
- Whipped cream (for topping)
- Fresh mint leaves (for garnish, optional)
- Substitutions:
- Milk: Almond or oat milk can be used for a dairy-free version.
- Pudding Mix: Use banana-flavored pudding for an extra banana kick.
- Cookies: Gluten-free cookies can be substituted for those with dietary restrictions.
Instructions
- In a medium bowl, whisk together the milk and instant vanilla pudding mix until smooth. Let it sit for about 5 minutes to thicken.
- In another bowl, whip the heavy cream with powdered sugar and vanilla extract until soft peaks form.
- Gently fold the whipped cream into the pudding mixture until well combined.
- In serving cups or bowls, start with a layer of vanilla wafers or graham crackers at the bottom.
- Add a layer of the pudding mixture over the cookies.
- Place a layer of sliced bananas on top of the pudding.
- Repeat the layers until the cups are filled, finishing with a layer of pudding on top.
- Cover the cups with plastic wrap and refrigerate for at least 2 hours to allow the flavors to meld.
- Before serving, top with whipped cream and garnish with fresh mint leaves if desired.
Step 1: Prepare the Pudding
Step 2: Assemble the Cups
Step 3: Chill and Serve
Notes
- Tips: For added flavor, consider adding a sprinkle of cinnamon or nutmeg between the layers.
- Substitutions: Use chocolate wafers for a chocolate twist on this classic dessert.
- Storage Instructions: Store any leftovers in the refrigerator for up to 2 days.