Stunning Red Velvet Cake Pops: A Delicious Treat
Introduction
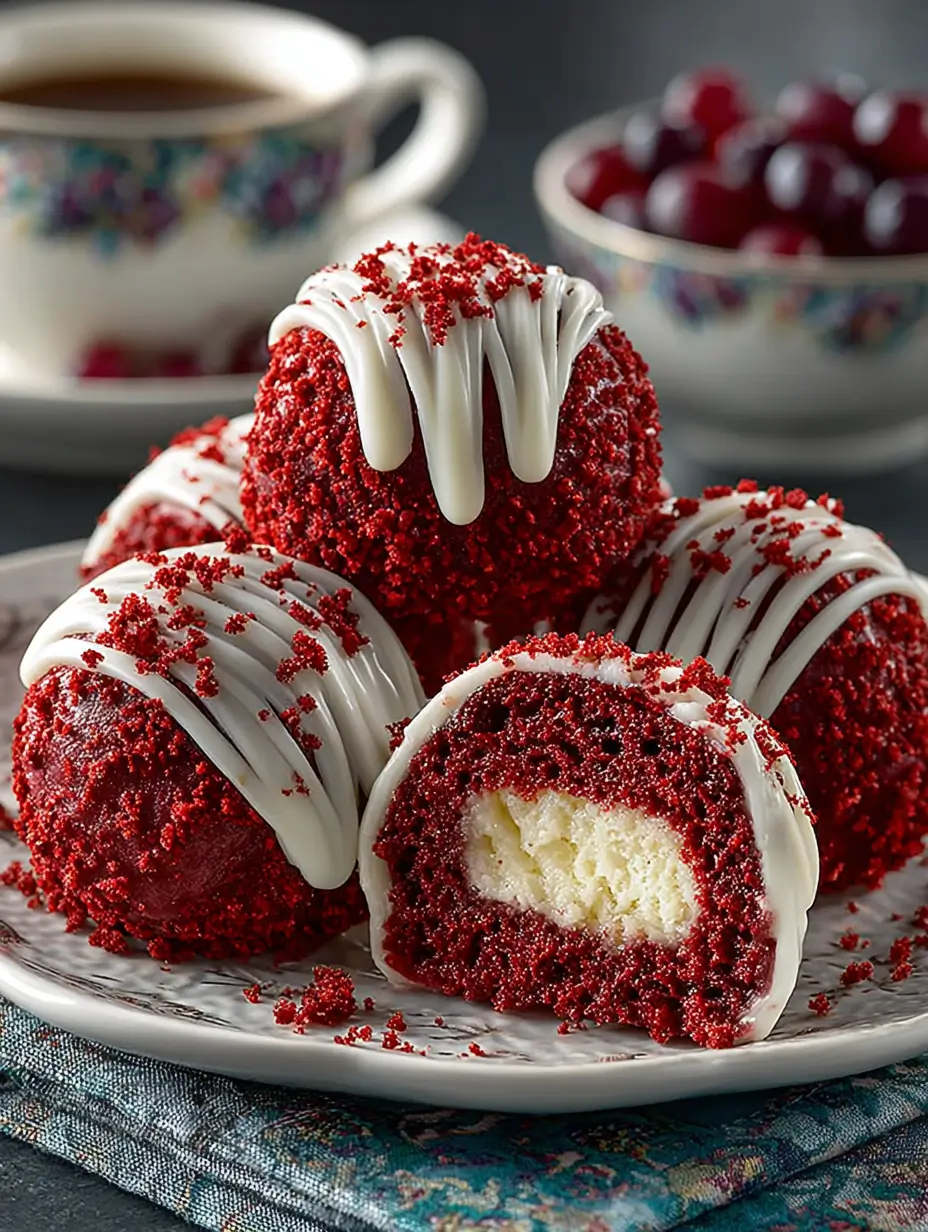
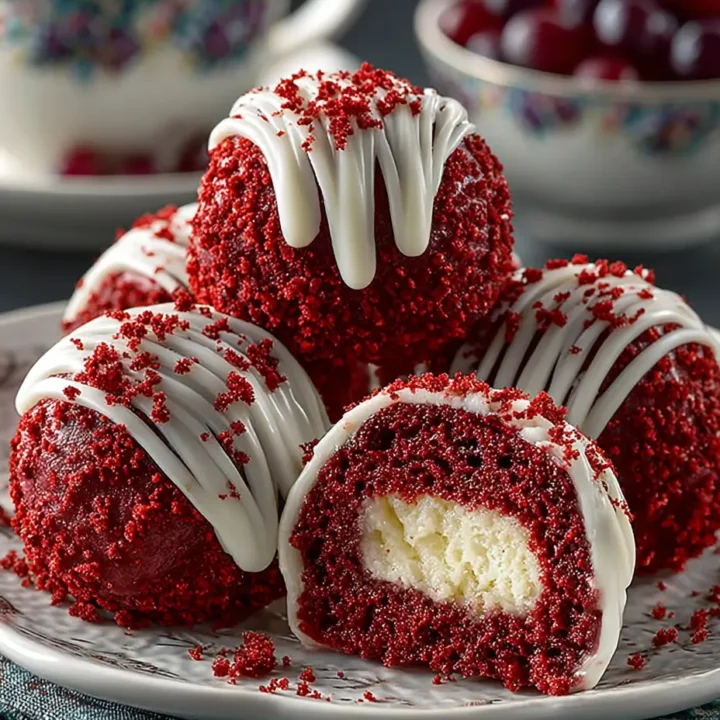
Red Velvet Cake Pops are a fun and festive dessert that combines the classic flavors of red velvet cake with the convenience of cake pops. These bite-sized treats are perfect for parties, celebrations, or just a sweet indulgence. Coated in creamy chocolate and decorated with sprinkles, they are not only delicious but also visually stunning. Let’s dive into how to make these delightful cake pops!
Ingredients List
For the Red Velvet Cake:
- 2 cups all-purpose flour: For the cake base.
- 1 1/2 cups granulated sugar: For sweetness.
- 1 teaspoon baking soda: For leavening.
- 1 teaspoon baking powder: For leavening.
- 1 teaspoon salt: To enhance flavor.
- 1 teaspoon cocoa powder: For a hint of chocolate flavor.
- 1 cup vegetable oil: For moisture.
- 1 cup buttermilk: For richness.
- 2 large eggs: For binding.
- 2 tablespoons red food coloring: For the classic red velvet color.
- 1 teaspoon vanilla extract: For flavor.
- 1 teaspoon white vinegar: To react with baking soda.
For the Cream Cheese Frosting:
- 8 oz cream cheese: Softened.
- 1/2 cup unsalted butter: Softened.
- 4 cups powdered sugar: For sweetness.
- 1 teaspoon vanilla extract: For flavor.
For Coating:
- 12 oz white chocolate or candy melts: For coating.
- Sprinkles: For decoration (optional).
- Lollipop sticks: For serving.
Timing
Preparing Stunning Red Velvet Cake Pops takes about 2 hours, plus cooling time:
- Preparation Time: 30 minutes
- Baking Time: 25-30 minutes
- Cooling Time: 30 minutes (for the cake)
- Assembly and Coating Time: 30 minutes
- Total Time: Approximately 2 hours.
Step-by-Step Instructions
Step 1: Prepare the Red Velvet Cake
- Preheat Oven: Preheat your oven to 350°F (175°C). Grease and flour a 9×13-inch baking pan.
- Mix Dry Ingredients: In a large bowl, whisk together 2 cups all-purpose flour, 1 1/2 cups granulated sugar, 1 teaspoon baking soda, 1 teaspoon baking powder, 1 teaspoon salt, and 1 teaspoon cocoa powder.
- Mix Wet Ingredients: In another bowl, combine 1 cup vegetable oil, 1 cup buttermilk, 2 large eggs, 2 tablespoons red food coloring, 1 teaspoon vanilla extract, and 1 teaspoon white vinegar. Mix until well combined.
- Combine Mixtures: Gradually add the wet ingredients to the dry ingredients, mixing until just combined.
- Bake: Pour the batter into the prepared baking pan and bake for 25-30 minutes, or until a toothpick inserted into the center comes out clean. Allow the cake to cool completely in the pan.
Step 2: Make the Cream Cheese Frosting
- Beat Cream Cheese and Butter: In a medium bowl, beat 8 oz softened cream cheese and 1/2 cup softened butter together until creamy.
- Add Sugar and Vanilla: Gradually add 4 cups powdered sugar and 1 teaspoon vanilla extract, mixing until smooth and fluffy.
Step 3: Crumble the Cake
- Crumble the Cake: Once the cake is completely cool, crumble it into a large bowl using your hands or a fork until it resembles fine crumbs.
- Add Frosting: Add the cream cheese frosting to the crumbled cake, mixing until fully combined. The mixture should be moist enough to hold together when rolled into balls.
Step 4: Form the Cake Pops
- Roll into Balls: Using your hands, roll the cake mixture into 1-inch balls and place them on a baking sheet lined with parchment paper.
- Chill: Place the cake balls in the refrigerator for about 30 minutes to firm up.
Step 5: Coat the Cake Pops
- Melt Chocolate: In a microwave-safe bowl, melt 12 oz of white chocolate or candy melts in 30-second intervals, stirring until smooth.
- Insert Lollipop Sticks: Dip the end of each lollipop stick into the melted chocolate and then insert it into the center of each cake ball. This helps to secure the stick.
- Coat the Cake Pops: Dip each cake pop into the melted chocolate, allowing any excess to drip off. Tap gently to remove excess chocolate.
- Decorate: If desired, immediately sprinkle with colorful sprinkles before the chocolate sets.
- Set: Place the coated cake pops upright in a block of Styrofoam or a cake pop stand to allow the chocolate to set completely.
Step 6: Serve
- Enjoy: Once the chocolate has hardened, your stunning red velvet cake pops are ready to be enjoyed! Serve them at parties, celebrations, or as a sweet treat any time.
Notes
- Storage: Leftover cake pops can be stored in an airtight container in the refrigerator for up to 1 week.
- Variations: You can use dark chocolate or milk chocolate for coating, or add flavors like orange zest to the frosting.
- Common Mistakes: Ensure the cake is completely cooled before crumbling to prevent melting the frosting.
Nutritional Information
Here’s a rough breakdown of the nutritional content per cake pop (based on 24 cake pops):
| Nutrient | Amount per Cake Pop |
|---|---|
| Calories | 150 |
| Protein | 2g |
| Fat | 7g |
| Carbohydrates | 22g |
| Sugar | 10g |
Note: Nutritional values may vary based on specific brands and ingredient choices.
Healthier Alternatives for the Recipe
To make your Stunning Red Velvet Cake Pops a bit healthier, consider these modifications:
- Use Whole Wheat Flour: Substitute half of the all-purpose flour with whole wheat flour for added fiber.
- Reduce Sugar: Decrease the amount of sugar in both the cake and frosting.
- Greek Yogurt: Use Greek yogurt instead of cream cheese for the frosting for a lighter option.
Serving Suggestions
Enhance your Red Velvet Cake Pops experience with these serving suggestions:
- Display on a Stand: Present the cake pops on a decorative stand for a stunning visual effect.
- Pair with Coffee or Tea: These cake pops pair wonderfully with a warm cup of coffee or tea.
- Gift Packaging: Package them in clear bags tied with ribbons for a lovely gift idea.
Common Mistakes to Avoid
- Not Chilling the Cake Balls: Chilling helps the cake pops hold their shape when dipped in chocolate.
- Overheating the Chocolate: Melt chocolate slowly to avoid burning it; stir frequently for a smooth consistency.
- Skipping the Stick Dip: Dipping the stick in chocolate before inserting it into the cake ball helps secure it better.
Storing Tips for the Recipe
- Refrigeration: Store cake pops in an airtight container in the refrigerator for up to 1 week.
- Freezing: Uncoated cake balls can be frozen for up to 3 months. Thaw in the refrigerator before coating.
- Prepping Ahead: You can prepare the cake balls and frosting ahead of time and assemble them the day of serving.
Conclusion
In summary, Stunning Red Velvet Cake Pops are a delightful and visually appealing treat that combines rich flavors with a fun presentation. Perfect for any occasion, these cake pops are sure to impress your guests. Give this recipe a try, and don’t forget to share your feedback in the comments or subscribe for more delicious updates!
FAQs
Can I use a different flavor of cake?
Yes! You can use any flavor of cake you like, such as chocolate or vanilla.
How do I know when the cake pops are done?
The cake pops are ready when the chocolate coating is set and firm to the touch.
Can I make these cake pops ahead of time?
Absolutely! You can prepare the cake balls in advance and coat them the day of serving.
What can I use instead of cream cheese frosting?
You can use buttercream or chocolate ganache as an alternative filling.
Are these cake pops gluten-free?
You can make them gluten-free by using a gluten-free flour blend in the cake recipe.
Now that you have all the details, it’s time to get making your Stunning Red Velvet Cake Pops! Enjoy the delicious flavors they bring to your table!
Stunning Red Velvet Cake Pops: A Delicious Treat
Ingredients
- For the Red Velvet Cake:
- 2 cups all-purpose flour: For the cake base.
- 1 1/2 cups granulated sugar: For sweetness.
- 1 teaspoon baking soda: For leavening.
- 1 teaspoon baking powder: For leavening.
- 1 teaspoon salt: To enhance flavor.
- 1 teaspoon cocoa powder: For a hint of chocolate flavor.
- 1 cup vegetable oil: For moisture.
- 1 cup buttermilk: For richness.
- 2 large eggs: For binding.
- 2 tablespoons red food coloring: For the classic red velvet color.
- 1 teaspoon vanilla extract: For flavor.
- 1 teaspoon white vinegar: To react with baking soda.
- For the Cream Cheese Frosting:
- 8 oz cream cheese: Softened.
- 1/2 cup unsalted butter: Softened.
- 4 cups powdered sugar: For sweetness.
- 1 teaspoon vanilla extract: For flavor.
- For Coating:
- 12 oz white chocolate or candy melts: For coating.
- Sprinkles: For decoration (optional).
- Lollipop sticks: For serving.
Instructions
- Preheat Oven: Preheat your oven to 350°F (175°C). Grease and flour a 9x13-inch baking pan.
- Mix Dry Ingredients: In a large bowl, whisk together 2 cups all-purpose flour, 1 1/2 cups granulated sugar, 1 teaspoon baking soda, 1 teaspoon baking powder, 1 teaspoon salt, and 1 teaspoon cocoa powder.
- Mix Wet Ingredients: In another bowl, combine 1 cup vegetable oil, 1 cup buttermilk, 2 large eggs, 2 tablespoons red food coloring, 1 teaspoon vanilla extract, and 1 teaspoon white vinegar. Mix until well combined.
- Combine Mixtures: Gradually add the wet ingredients to the dry ingredients, mixing until just combined.
- Bake: Pour the batter into the prepared baking pan and bake for 25-30 minutes, or until a toothpick inserted into the center comes out clean. Allow the cake to cool completely in the pan.
- Beat Cream Cheese and Butter: In a medium bowl, beat 8 oz softened cream cheese and 1/2 cup softened butter together until creamy.
- Add Sugar and Vanilla: Gradually add 4 cups powdered sugar and 1 teaspoon vanilla extract, mixing until smooth and fluffy.
- Crumble the Cake: Once the cake is completely cool, crumble it into a large bowl using your hands or a fork until it resembles fine crumbs.
- Add Frosting: Add the cream cheese frosting to the crumbled cake, mixing until fully combined. The mixture should be moist enough to hold together when rolled into balls.
- Roll into Balls: Using your hands, roll the cake mixture into 1-inch balls and place them on a baking sheet lined with parchment paper.
- Chill: Place the cake balls in the refrigerator for about 30 minutes to firm up.
- Melt Chocolate: In a microwave-safe bowl, melt 12 oz of white chocolate or candy melts in 30-second intervals, stirring until smooth.
- Insert Lollipop Sticks: Dip the end of each lollipop stick into the melted chocolate and then insert it into the center of each cake ball. This helps to secure the stick.
- Coat the Cake Pops: Dip each cake pop into the melted chocolate, allowing any excess to drip off. Tap gently to remove excess chocolate.
- Decorate: If desired, immediately sprinkle with colorful sprinkles before the chocolate sets.
- Set: Place the coated cake pops upright in a block of Styrofoam or a cake pop stand to allow the chocolate to set completely.
- Enjoy: Once the chocolate has hardened, your stunning red velvet cake pops are ready to be enjoyed! Serve them at parties, celebrations, or as a sweet treat any time.
Step 1: Prepare the Red Velvet Cake
Step 2: Make the Cream Cheese Frosting
Step 3: Crumble the Cake
Step 4: Form the Cake Pops
Step 5: Coat the Cake Pops
Step 6: Serve
Notes
- Storage: Leftover cake pops can be stored in an airtight container in the refrigerator for up to 1 week.
- Variations: You can use dark chocolate or milk chocolate for coating, or add flavors like orange zest to the frosting.
- Common Mistakes: Ensure the cake is completely cooled before crumbling to prevent melting the frosting.